 Live Canva Design Training!
 You have some blog posts, you’ve got Pinterest and you’ve played around in Canva, the free design software so many bloggers rave about. But now what?
If you’re wondering how to create a pin for Pinterest and need to know more about creating Canva Pinterest templates, you’ve just hit the jackpot.
I’m about to walk you through my step-by-step process for creating Canva Pinterest templates.
And, I’m going to wow you even more with some simple design tips you can apply to your Pinterest pin designs going forward.
There are free Pinterest pin templates and a free video, too! It really can’t get any better, can it?
[disclosure]
First things first…
Why Canva for Pinterest Templates?
First things first. I don’t use Canva for creating my own graphics. I use the Adobe Suite. But, I don’t expect you to – yet, anyway.
The truth is, is that many bloggers are intimidated by Adobe programs. There are more tools than you’ll ever need and more options that you’d ever know what to do with. Canva offers a much simpler solution to creating blog graphics and visual content for your website. It’s easy to learn and more importantly, easy to use.
There is a free version of Canva and a paid version (currently $12.95.month). The paid version includes everything in the free version, but gives you the option to do things like:
- Upload custom fonts for your brand
- Have unlimited folders for your designs
- Set color palettes for your brand
- Save templates
- Resize designs into custom dimensions
- Download designs with transparent backgrounds (and more!)
My advice is to use whatever you can afford right now.
Before we go any further, we need to pause for a second and talk about how important it is to be creating really great looking pins. Wht? Because if your pins don’t look good, you’re going to have a hard time getting clicks to your website.
I love this element of a Pinterest strategy SO MUCH, that I’ve created a free on-demand Pin Design Workshop just for you!
If you’re ready to go from pin design shame to pin design gain, this training is going to put you on the fast track to creating beautiful pins for all of your content, that actually convert. Click right here to register and the on-demand workshop will be sent to you immediately! (No waiting for a specific time that you can’t commit to.)
Alright, now that you know that your pin design is crucial, and you’ve hopefully signed up for the free workshop, let’s dig in.
How to Create Canva Pinterest Templates Video Tutorial
Creating Pinterest pin templates in Canva is simple! (I’m calling them templates because, essentially, that’s what they are. Once you create a single pin, you can then switch out the image and text to create more pins for more posts! This saves time since you aren’t reinventing the wheel every time.
Watch the video below to see a quick tutorial. Don’t stop there! The rest of the post has tons more great info including the four golden rules of pin design and some FREE Pinterest templates!
The color picker tool I mention in the video is called ColorZilla. you can download the browser extension for Chrome and Firefox right here.
I highly recommend creating your own set of templates as opposed to using the stock templates that Canva offers. Do you know how many people use Canva? Over 10 MILLION. These 10 million users all have access to the same free templates that you do. Choose to stand out with your own templates instead.
What is the Ideal Pinterest Pin Size?
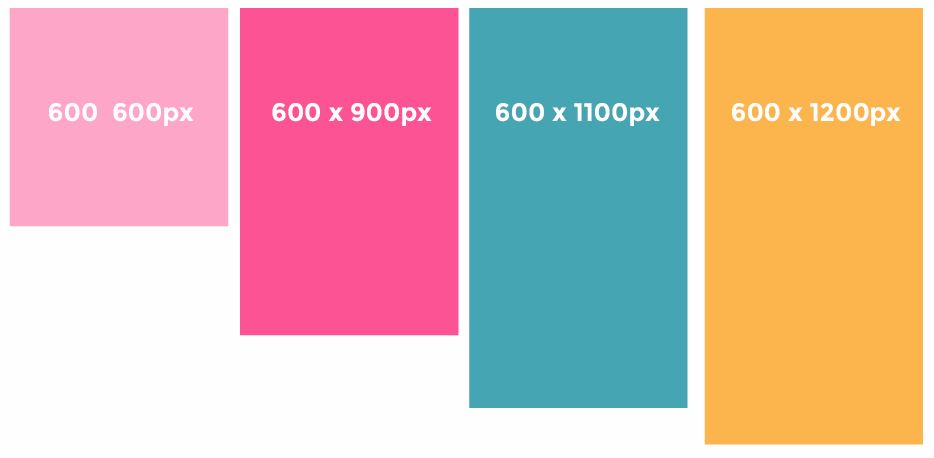
Pinterest states that the ideal pin size is a 2:3 ratio. I create all of my pins at 600px 900px, which is pretty. You can make them longer if you want but they may get cut on in the feed. in her article, How to Use Pinterest, Suzi from startamomblog.com shares this interesting tidbit:
“The maximum pin size you can do is 600×1200 pixels. However, if someone is searching for chicken recipes and there is a pin that is 600×900 and one that is 600×1200, the larger pin is taking 30% more space on your screen. For the longer pin to show up first in the results it has to have 30% more engagement than the smaller pin.
Make sense right? Basically, you have to earn the real estate space. It makes sense to create both a 600×900 and 600×1200 pin. And don’t be afraid to try out square pins too.”
Suzi Whitford, Start A Mom Blog
More Pin Design Tips to Help You Craft the Perfect Pin
Use an Enticing Headline
Remember, you’re not designing pins for yourself. You’re designing pins for your audience. Craft your headlines around what they may be searching for on Pinterest. Do some keyword research. Add in a few power words.
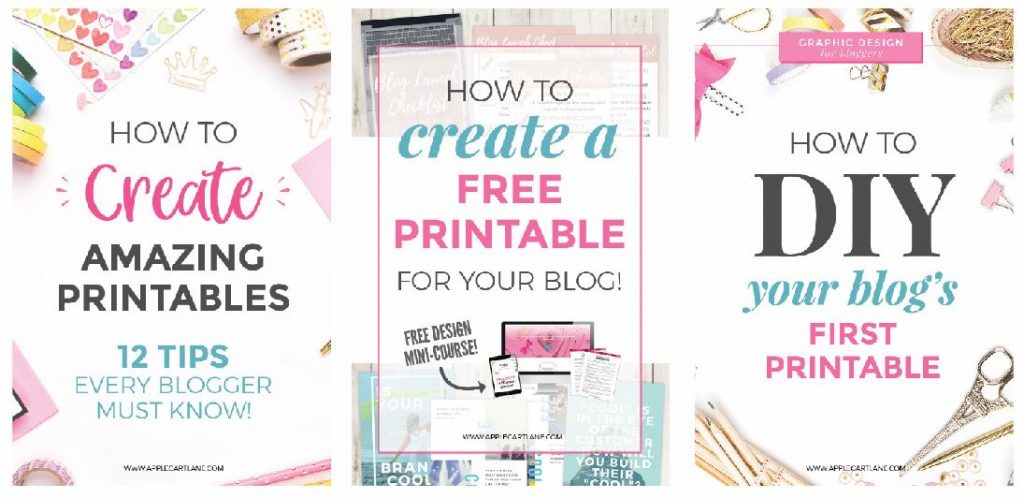
I recommend that you test out various headlines and create multiple pins for your posts. Come up with multiple headlines you can use on other pins. Once you have those headlines, make multiple pins for the same post then schedule them using Tailwind. (Pinterest LOVES when you pin new pins multiple times a week – or even daily!)
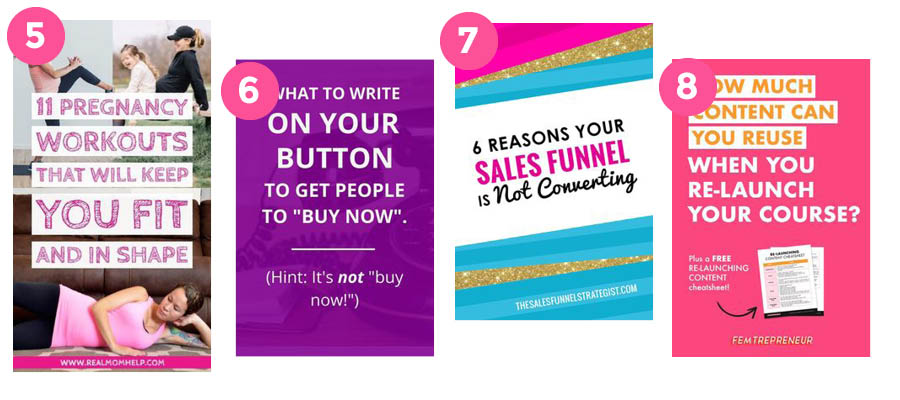
Here’s an example of multiple pins with different headlines, created for the same post:
Choose Your Image Wisely
The image you choose for your pin just might be the most powerful element you use! If you have any photography skills or are going for that “real-life” look, you can use your own. If you’re like the rest of us, you’ll find yourself scouring the internet for the perfect image.
Don’t go searching on Google for images. And, be choosy. Don’t use the first image you see. Look for more emotional images that will draw people in.
There are websites like Pixabay and Unsplash where you can find some decent free stock images. But, if you’re looking for stock photos with a bit more personality and branded look, check out websites like PixiStock or IvoryMix.
(Ivorymix is my favorite website for top-notch styled stock photography. I have the pro membership and exclusively use all of them for all of the Pinterest pin templates in my shop!)
Adding Text
Firstly, use your brand fonts if you’ve got them! If not, don’t go too crazy with different fonts. Stick to two-three fonts for the best result. Readability is super important. Remember, your viewers are sitting on their couch, waiting in the waiting room at the Dr.’s office – on their phone. Consider the font style you choose and how your viewers will relate to it.
Colors
Use your brand colors. If you don’t have a set, I’ve heard that warm colors tend to do better on Pinterest but the jury is out on that. I’ve seen black pins that are VERY eye-catching in my feed! Most importantly, use colors that make your viewers feel the feels. Add color with overlays, bits of text, or pops of color behind your text to help it stand out.
Here are a few pins from my article, 53 Pin Designs that You Can Steal that showcase a great use of color and contrast:
Color helps a ton with creating contrast. Contrast is a design principle you don’t want to ignore. It will help draw attention to your pin and help it stand out in the feed.
For a peek into my super simple and straightforward Pinterest pin design process, download my free Pin Design Roadmap.
Call to Action
People don’t know what you want them to do unless you blatantly tell them to! Use action words like “click to read more” or add a button. Add a mock-up to your freebie if you want to really drive traffic. This way, viewers will not only pin your pin but visit your website.
You’ve Designed a Pin, Now What?
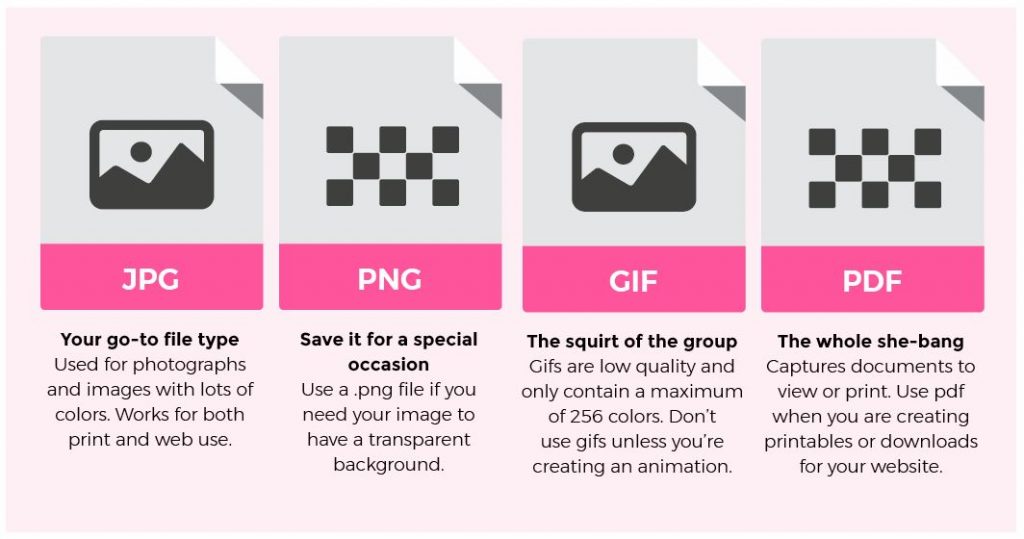
Export the pin as a .jpg out of Canva. Wondering why Canva recommends a .png? I wish I knew. .Pngs are a little larger than .jpgs and you want your images to be as small as possible while still retaining their quality. So I say, stick with .jpgs.
Naming Your Image File
Your file will download to your browser window or wherever you have your downloads set to go. Canva names the file based on what you have it titled in Canva, or the first text you use on the graphic.
For optimization purposes, you’ll want to change that to something that makes sense keyword wise. Using keywords in your images is just another way to make Google happy when it comes to SEO.
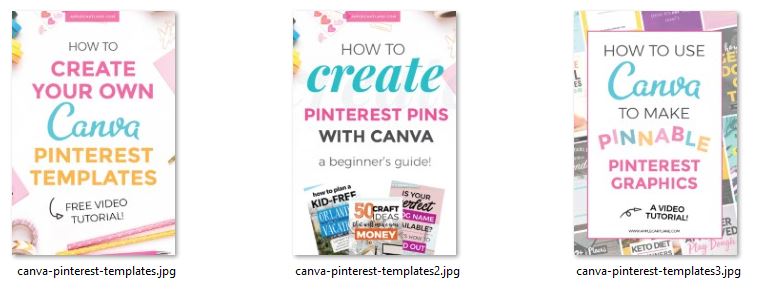
For example, the pin graphic I created for this post is called “canva-pinterest-templates.jpg” because that is the keyword I’m targeting for this post. Any additional pins that I create would be named
“canva-pinterest-templates1.jpg”, “canva-pinterest-templates2.jpg” and so on.
Publishing Your Pin
Now it’s time to upload the file to your WordPress image library! Upload it there and add a shot alt description. The alt description is yet another bit of info that Google uses for SEO purposes and to see what your image is about.
The alt tag is also what appears as a pin’s description when someone pins directly from your website, so you want to write it to include keywords and be a little catchy.
How to Pin a Pin to Pinterest
Say that ten times fast! There are a few ways to pin your pin to Pinterest.
The easiest is to insert the pin image into your blog post or page. Then visit the live link and using the Pinterest browser extension, hover over your image, and pin to your board from there.
*If you want to get real fancy, you can also create a custom pin-it button that appears on all of your images on rollover! I use jQuery Pin It Button for Images.
You can also pin directly from your Media Library. I do this when I create multiple pins for a post that I don’t want to hide in the post. The big thing you have to remember when doing this is to change the URL to the right destination on your website! If not, it will just link to an image file, not your article.
Schedule Your Pin in Tailwind
Now it’s time to get your pin in front of hundreds and thousands of viewers! Tailwind is the only Pinterest approved scheduling tool and I love it! It saves me tons of time pinning both my own content and other people’s content.
Click here for a 30-day free trial.

Since I try to publish a new pin no less than four times a week, Tailwind is a HUGE time saver. All I have to do is schedule the pin and it automatically goes onto any boards I tell it to.
First, I pin it to my most relevant personal boards. Then, I pin it to the 45+ group boards I am a member of starting with the most relevant, then moving on to the boards that have the highest virality score. (Tailwind provides you TONS of stats so you know which boards are working the best for you!)
Scheduling multiple new pins a week means that my lovely pins are being pushed through Pinterest for months out!
Related: How to Quickly Create Multiple Pins.
So there you have it, how to create Canva Pinterest templates from start to finish! And, a few more tips I couldn’t leave out:) Now head over to Canva and start designing!
I can’t wait to see what you create, and don’t forget to sign up for my free ON DEMAND Pin Design Workshop, The 5-Part Pin Design Formula!
I seriously love Canva! I hadn’t heard that warmer colors do better on Pinterest. I’m interested in seeing if I can test that somehow. Great article! Thanks for sharing 🙂
You can always try some a/b testing with pins to see what works better for your audience!
Really helpful post!! Thanks!
Wow this was stocked full of amazing content! I was using tailwind but fell off but this has convinced me to give it another try!
I LOVE Tailwind and couldn’t live without it!
Thank you for sharing your experience with canva! Your pinterest templates are absolutely beautiful – I’ll definitely need to save your post for future reference! 🙂
Wonderful! Thanks for stopping by!
Great info and your graphics are on point!
Hi! So happy I found this helpful article. One question: I have learned that you shouldn’t reuse images more than a couple times per year. If you use an image for a pin, let’s say just a sky background, and then use the same image for another blog post and filter the image in Canva, maybe some sunny color added, would that count as a different image, or would Pinterest or Google see it as repetitive?
Hi Jennifer! Great question. If you modified the image, or even used the same image but added a different pin title to it, Pinterest will consider that a “fresh pin”. Especially if it leads to different content! You can absolutely reuse images, especially if you are changing them up!