 Live Canva Design Training!
 In this article, I am going to share with you everything I know about how to design a printable for your blog or business.
Printables are one of the best and quickest ways to help grow your blog. You can use them to grow your email list, sell them online and even turn them into tangible products that people will actually buy from you! Your options for them are endless and your imagination is the only limit. This leaves the doors wide open for you to turn just about any idea into a printable your viewers will eat up.
[disclosure]
This brings me to my next point. PLEASE don’t let it scare you off.
I Can’t Teach You How to Design a Printable.
HOLD UP!!!
Before you tap that little “x” in the top right corner…let met explain something. Although I can’t provide you the perfect step-by-step tutorial for how to create a printable that is specific to you, I will teach you all of my best professional graphic design tips to help you craft a printable that will make you feel and look like you know exactly what you are doing. The best part? You can apply these tips to just about EVERY printable you create from here on out. And that’s the best kind of knowledge to have.
So let’s jump into my version of how to design a printable. Rather, specific design guidelines you should follow if you want to end up with something your readers will: a. hand over their email address for. Or, b. Enter in those magical 16 digits that will make your bank account grow.
In this article, I’m going to assume that you’ve already decided on the specific type of printable you are going to create. If not, go do that. How do you want to help your viewers? Do you have certain content on your blog that resonates more than others? What can you create as a “bonus” to this content? Printables come in many forms: checklists, worksheets, step-by-step guides, planners, calendars, schedules, trackers and even less traditional things like birthday invitations, motivational quotes, decor, and so much more. Your creativity is the only limit!
How to Design a Printable: Design Tips for Non-Designers
Plan It Out
If it’s one thing you take away when it comes to how to design a printable, let it be this. Plan your design out before you get started! This is an important step that most will just look past. I know you’re anxious to start designing your perfect printable, but take a step back and think about its purpose first. Jot down everything that needs to be included and how you wish your viewers to use it. Consider how you would use the printable. Determine the sections of your printable. Figure out what goes together and what isn’t really related. In the world of design, this is called Proximity. This principle is SO important that I even dedicated an entire lesson in my signature course, The Blogger’s Design Primer.
Avoid Basic Graphic Design Mistakes
Even if you’re not a designer, that doesn’t mean that you don’t need to follow some basic graphic design principles. Learning some basic skills can go a very long way in the professionalism of your Pinterest pin design. You don’t need to have years of design experience or extensive knowledge of design theory to design a printable that looks professional.
I’ve created a free design mini-course that will teach you ten easy to implement design tips that will take your pins to a new level of design. Enroll in the course and start designing better pins that will improve your Pinterest strategy right away!
Use The Right File Type
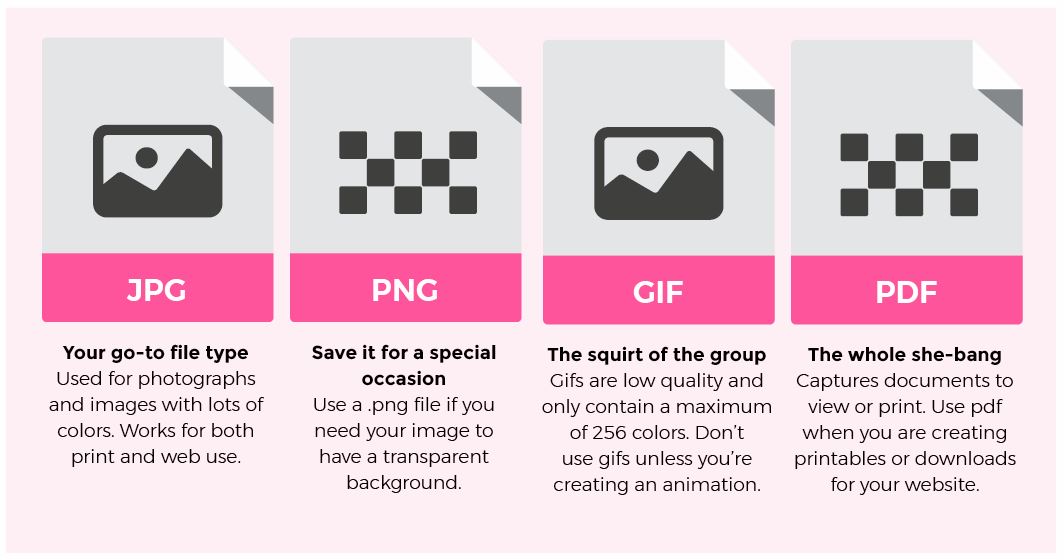
When it comes to how to design a printable, make sure you are creating your file in the right format and ideal resolution for use. If it is a printable that is intended to be printed, (as most are) the best file type for output is a .pdf. You’ll also want to create your file at a minimum of 300 dpi. (dots per inch in design lingo) Dpi is the resolution of your document. The higher the dpi, or resolution, the better quality your printable will print. If your file is meant to be used digitally, a .pdf at 72 dpi will do. This will result in a lower quality file, but that is okay since most often computer monitors don’t display over 72 dpi. there are a handful of different file types, but do you know what each of them are specifically for?
Keep it Organized
The purpose of creating this printable is most likely to make someone’s life simpler. Therefore, your printable needs to be as organized as can be. A lot of the organization will form in the planning phase of creating your printable. Even so, always keep organization in the forefront of your mind as you’re designing. There is nothing worse than a printable that is more irritating because it doesn’t make sense to the user.
Make Sure it is Readable
With 1000’s of fonts to choose from, it’s easy to get carried away and want to choose the fanciest fonts when learning how to design a printable. Don’t do this! Stick to readable fonts. Make sure they are sized appropriately so the user can easily read and digest them. Stick to your brand fonts if you’ve got some. If not, the safest is to choose a basic sans serif font to work with. If you are using any display fonts or script fonts, use them sparingly. Using them as the title of your printable will be fine but don’t use them much throughout.
Keep it Simple
When you are a beginner designer, it’s hard to design simple. There is a tendency to feel like things aren’t “designed enough”. But, the key to design is not to make things look over-designed. They need to look intentional and purposeful. This usually means keeping it simple. Make sure all of your design decisions have a reason and don’t just use elements for the sake of using them. This creates unnecessary clutter that most designs don’t need.
Don’t Forget About White Space
You don’t need to fill up your entire page with stuff! Make sure all parts of your design have a bit of breathing room as to not overwhelm the user. Keep all elements at least 1/4 inch from the edge of your document. This is also helpful for those printing your files since most home printers don’t print to the edge of the paper. White space will help your printable be clear and more organized if you use it right. Oh, and white space doesn’t have to be white! It can be any space where there is no visual element.
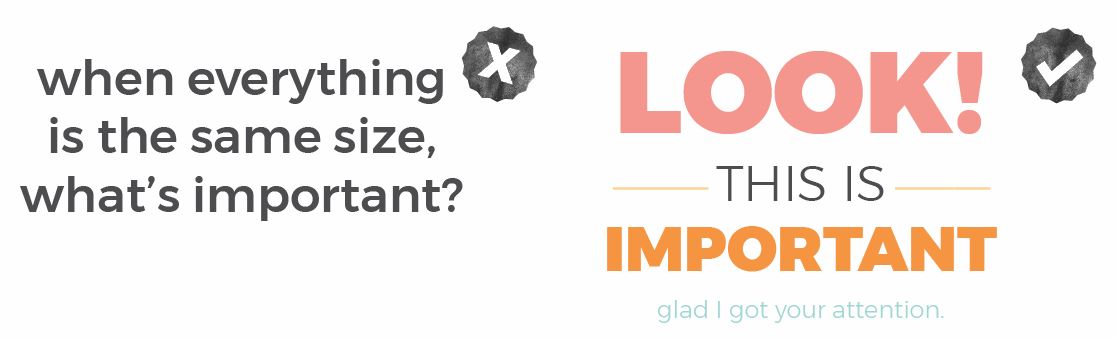
Consider Visual Hierarchy
Hierarchy helps people see the most important stuff first within a design, so you’ll want to make sure you use it to help your viewers understand your printable as you intend it. This might mean making the title of the thing much larger and possibly in a different font than the contents, drawing attention to the directions or another important part of your printable. Consider what you want the user to see first, second and third when using your printable. This all ties into the planning and general flow of your design.
Infuse Your Brand
If you have brand colors, fonts, and styles, by all means, use them! Your brand is your vehicle for being noticed, becoming recognized and standing out online so take advantage of it. If you don’t have a brand, I recommend starting to think about how you want to represent yourself in the online space. I love this comprehensive article about how to brand your blog. It’s the most comprehensive article I have come across.
Add your URL and Blog Name
Don’t forget this important detail! Always put your blog or business name and URL at the very bottom of your document. This way, nobody can run off with your printable and think they are going to use it as their own without spending a little bit of time removing your information. It’s also helpful in the event that someone downloads something from you and wants more of what you offer down the road. They won’t have to go on a hunt to find you if your information is at the bottom of your printable.
So there you have it, some basic rules to follow if you’re wondering how to design a printable for your blog or business. As i stated before, there are so many different printables you could create for lots of different niches and needs. If you need some inspiration, you can always check on Pinterest, Etsy or Creative Market. Ask your audience what they want! If you’re still stuck, I share my tips on knowing exactly where to start with any design in this post.
Upload it for Use
Once you have your completed file exported and ready for use, it’s time to upload it to your website so your users can download/buy it! I simply just upload it to my WP media library and then directly link to it when I want to make it available for download. Once you have multiple printables, you may want to consider creating a resource library that has all of your freebies in an easy-to-access place. My friend Kimi, has a free course that will get your resource library up and running on your own blog or website.
Promote it!
Now it’s time to get your printable in front of your audience! There are many ways to do this, but my favorites ways to promote are:
- In Facebook groups, (here’s an extensive guide to the best Facebook groups you can promote your stuff in.)
To your email list - Adding it to relevant places around you website like blog posts and your sidebar
- Creating multiple Pinterest pins and promoting in on Pinterest!
If you want to go all out, you can quickly throw together a landing page that will result in even more conversions! I promise you, building a quick landing page is not hard if you have the right tools!:)
Now, its time to sit back, and watch the email subscribers (or money!) roll in.
How to Collect Those Email Addresses and Deliver Finished Product
Depending on the mail service provider you are using, they probably offer some kind of basic opt-in form. I use Convertkit for all of my email needs and I love everything about their software… Although I love them as an email service provider, I feel very limited when it comes to the opt-in forms and landing pages they offer. I could never create anything that fit my expectations. I wanted a software that gave me LOTS of options and was created specifically for collecting email addresses in a beautiful and functional way. Enter Thrive Leads. If you want ENDLESS custom options for collecting those precious email addresses, look no further.
Thrive also has a landing page builder, Thrive Architect that will allow you to create ANY kind of page for your website, including high converting landing pages for your new sparkly printables. I love that it is a one time charge instead of something monthly, too. These two plugins combined have empowered me to grow my blog unlike any other tool in my arsenal.
P.S Don’t forget to enroll in my free design mini-course where you’ll learn ten tips for designing better Pinterest pins, blog graphics and any other visual content you create for your blog. Learning the basics of design is a skill you can apply to just about everything you create for your blog or biz!
I can’t wait to see what you create!

I have been working on printable for my blog from sometime and this post is spot on. Thanks for this useful tips.
Happy to help! Thanks:)
I LOVE ALL OF YOUR BLOG POSTS! It was your blog that helped me decide to finally get into blogging myself. I’ve had several friends and family members tell me they think I should, but I never took it too seriously. But I finally started one, it’s still very new, very basic, and I have A LOT to learn. So any & all advice, tips, or tricks that you have to offer would be more than appreciated!
Awesome to hear!